
Week1 Week2 Week3 Week4 Week5 Week6 Week7 Week8 Week9 Week10 Week11 Week12 Week13 Week14 Week15 Week16 Week17 Week18 Week19 Week20 Week21 Week22 Week23 Week24 Syllabus
Week 13 - Starting Sunday 01/02/2014 - Valencia, Venezuela. Week 13 Syllabus
Introduction - Hello everybody. For those who don't know me. Who is Tom Hodgers?


Ex- Rocker, Beatle Maniac, One-Man Band, Hippy, Time/Space Traveler, Japanophile, Kendo-ka, Aikido-ka, Zen Buddhist, Philosopher, Mad Scientist.
Learning Practitioner.

Week 14 - Starting Sunday 08/02/2014 - Valencia, Venezuela. Week 14 Syllabus
Creating Class Elements Part 1: Images and screen-shots
 | ||||
| This image captured from my friend Tony Gurr's blog page http://allthingslearning.wordpress.com/ |
There are a lot of software programs available for capturing and downloading images. I've tried out many during the last few years (Jing, SnagIt etc.) but I always fall back on my favourite, the screen capture button on my machine.
The screen capture button is available on PCs and MACs.

On a MAC,
- Press the Apple key ⌘ + Shift + 3 all at the same time
- You will find a capture of the screen on your desktop named ‘Picture _’
I then use the free Irfanview or Paint program for editing.
Following are some notes I made for using images in a Moodle course:
Some notes about Images
Modern
computers will load pages full of images very fast. Speed of loading
will depend upon the users OS, free disk space, free RAM size and
Internet connection velocity.
The size of the image FILE is more important, this can affect performance more (both user and site).
The factors involved in SITE performance are basically the same as for any PHP-based database-driven system. Some MOODLE activity modules and filters can affect response velocity, typical culprits being: Chat module, Quiz module, Cron task and the Recent Activities Block. The base images delivered in the original Moodle distribution package provide unoptimized graphics, most of which can benefit from lossless recompression utilizing optipng for PNGs, gifsicle for GIFs and jpegoptim for JPGs.
Optimized graphics transfer faster and provide a faster perceived response for clients.
Here are some example images showing the difference between perceived image size and file size:
 |
| The original JPG file is 491x602 pixels with a file size of 42.4 Kb. |

DO NOT change the size of images when inserting them into a label on Moodle. Physical perceived size (acreage, or WidthxHeight in pixels) should be optimized before uploading.
In general, it is not advisable to reduce image size using these settings, since the image will be transferred over the internet in its original size no matter what reduction is set for it. This will slow the loading of your webpage.
This means, that if you have an image that is bigger in size than you want it to be on your page, you should reduce the size in a graphics program, rather than reducing the size on the webpage using the width and height attributes.
On the contrary, sometimes, it can be wise to enlarge images using this technique.
If you leave out the settings for width and height, the browser will automatically use the real size of the image.
However, you should always enter the settings for width and height, even when using the real size!
The reason is that if the settings are left out, the browser can't build the page until the image is entirely loaded.
This means, that a student cannot read text around the image while the image itself is loading - which in turn will give them an impression of a slow loading page.
This becomes especially true if the image is inside a table.
In that case, the whole table will not be shown until the image is entirely loaded.
Please take a look at my document How do you and others intend to use images?
Week 15 - Starting Sunday 16/02/2014 - Valencia, Venezuela. Week 15 Syllabus
Creating Class Elements Part 2: Audio and video

Please click on this podcast:
Continuing with the topic of making organized, configured additions to the course area, we come to Adding Video and Audio to your Course.
Quality Counts!
Understanding resolutions can be a challenge. The primary key to consider is that the higher the resolution, the better the product.With music, you will generally see terms like 48kHz or 24bit. The first one, kilo-Hertz or also kHz, signifies the size of the sound spectrum. Humans can normally hear from 20hz to 20kHz, though some individuals may be able to listen to a much higher frequency.
For most on-line video, 44kHz will be the most popular of the resolutions for the sound portion.
For 90% of the people, that level is ideal, but 10% can hear a distinct difference between 44khz and 48khz. These tend to be the “audiophiles” among us. They really can hear the differences that most of us can not.
There is very little variance in music between 96kHz music and 48khz music, but the variance between 44kHz and 48kHz is quite noticeable. If you further lower from 44kHz to 22kHz, it would be similar to the difference between CD music and a Telephone call.
Another popular phrase is in bits (i.e. 16bit or 24bit). It is a little confusing to describe the difference but, simply put, bits are units of the music array. The more bits, the better resolution the music will have.
More bits amounts to less frequency being crammed into the bit, which allows for the processing via computer to be much clearer by offering more defined audio.
In video, the same thing goes. 1920×1080 (The resolution known as 1080p) provides a clear picture, while 320×240 makes blocky video, that can be almost un-viewable if the camera darts or zooms.
When you see a “a X b” it is in reference to the amount of pixels, width x height. Some common resolutions are: 1920×1080 – 1080p, this is the highest resolution of the HD format, 1280×720 – 720p is the lowest of the HD format, 720×480 – 480p is a standard television signal.
Apart from this, you have the bit rate for video. The higher the bit rate, the more color information and definition will be packed into the frame.

More is better!
Always produce in the finest resolution possible. It’s much easier to lower resolution, than trying to range up to an increased resolution.n.b. When uploading or downloading Podcasts or music, to or from, some on-line programs, they only accept 128 Khz files.
Week 16 - Starting Sunday 23/02/2014 - Valencia, Venezuela. Week 16 Syllabus
Creating Class Elements Part 3: Screen-casting and multimedia
A Prezi recorded in the classroom, it's long, but gives an idea of Prezi with audio.
Following is one of the applications I use in every course I hold.
In this example it is an interactive mind-map originally made collectively in a F2F class of a blended learning course, then saved as a viewable, interactive SWF file from MindManager.
This mindmap was made in one of my Japanese Language and Society post-graduate diploma courses for Spanish speakers, and shows the topics to be covered in the "Communication in Japan" module. All of the topics to be covered in the module were brought to light (or added in a later class) by students in the initial module class.
Methods of Communication in Japan. Please click on the + signs to expand the map:
Week 17 - Starting Sunday 02/03/2014 - Valencia, Venezuela. Week 17 Syllabus
Our Students Online
Following is a FAQ list made with Google Forms on Google Drive.
The FAQ questions are taken from those I have on a Moodle course for fellow educators called "Using Moodle".
Week 18 - Starting Sunday 09/03/2014 - Valencia, Venezuela. Week 18 Syllabus
Classroom Management and Facilitation
Eric Robertson's excellent introduction to this week's topic:
As desktop functions transition to powerful mobile devices, and connectivity becomes ubiquitous, in-house boxes are nearing obsolescence.
According to a 2013 study by research firm Colmar Brunton, only 16 percent of small and medium business operators (SMEs) surveyed use Cloud computing. However, those SMEs that embrace the Cloud were over 100 percent more likely to enjoy increased revenue over the past year than those who didn’t.
So, where should your files be stored:
1. Within your course LMS? Can you upload all necessary files to your LMS server?
2. On a private in-house box or a disk on your own PC? Do you have sufficient disk space?
3. In the Cloud? What about the future? Will they still be there in 4-5 years?
So should you go the traditional route and use an in-house server (or upgrade the one you have) or subscribe to a Cloud server? Obviously, if you want complete control over your files, you'll have to use a private in-house box or your own PC so there is only one easy answer.
Use all three alternatives, and don't forget your back-up copies!
I have a lot of experience using Moodle but for this weeks task I took a look at another open source solution, Sakai.
Sakai differs from Moodle in a few key elements. It is built on Java, as opposed to LAMP (Linux, Apache, MySQL and PHP) and while it is open source, only certain key stakeholders and commercial affiliates are allowed to contribute to the source code. It is aimed at academic institutions as opposed to corporate training.
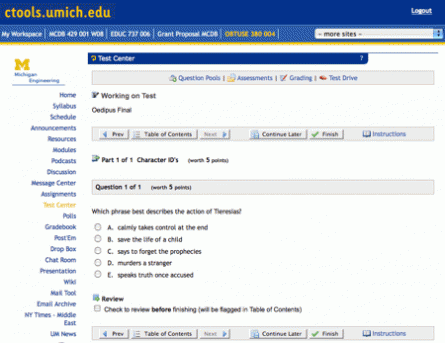
Tests and quizzes within Sakai
Sakai integrates with Google Docs, and includes tools like a wiki, online testing, presentation slides and the ability to use Dropbox as well. It enjoys the support of a well-endowed educational foundation which oversees the strategic development of the software. This means that significant resources ($6 million compared to Moodle’s $12,000 per year) can be brought to bear should any major issues arise. That said, because Sakai is Java-based as opposed to LAMP, some have argued this increases the total cost of ownership for users. Java servers and developers are typically more expensive than PHP ones. Additionally Sakai serves a narrower clientele and so there is not as broad a community of support, plugins and add-ons as there is with Moodle, for instance.
Week 19 - Starting Sunday 16/03/2014 - Valencia, Venezuela. Week 19 Syllabus
Introduction to Online Education Theory
Learning theories v 2
Connectivism
Connectivism offers us a theory of learning for the digital age that is usually understood as contrasting with traditional behaviourist, cognitivist, and constructivist approaches. It is a hypothesis of learning which emphasizes the role of social and cultural context. The relationship between work experience, learning, and knowledge, as expressed in the concept of "connectivity" is central to connectivism's metaphor of a network with nodes and connections. A node is anything that can be connected to another node such as an organization, information, data, feelings, and images.Connectivism sees learning as the process of creating connections and expanding or increasing network complexity. Not all connections are of equal strength. At its core, connectivism is a form of experiential learning which prioritizes the set of connections formed by actions and experience over the idea that knowledge is propositional.
Is social media a landscape for dialogue and should it be conceived and investigated based on this premise? A key lever in this argument is the increasingly important requirement for greater criticality on the Internet in relation to our assessment and development of connections with people and resources.
We need to shift our focus to promoting core evaluative skills for flexible learning that will, for example, allow us to actuate the knowledge we need at the point that we need it. We need to develop in our learners the ability to think, reason, and analyse.
Embracing connectivism means that we need to consider new design metaphors for future learning that place the person, their social behaviour, and their community at the centre of the design process and the resulting networked technologies.
Connectivism alone is insufficient to inform learning and its support by technology in an internetworked world. Because of its presence in massive open online courses (MOOCs), connectivism is influential in the practice of those who take these courses and who wish to apply it in teaching and learning. Thus connectivism is perceived as relevant by its practitioners but as lacking in rigour by its critics.

Week 20 - Starting Sunday 23/03/2014 - Valencia, Venezuela. Week 20 Syllabus
Introduction to Educational Technology and Instructional Design
History of Educational Technology (podcast of the presentation 2010)

Instrumentalism - Technology is just a tool
The technological instrumentalist position (technological instrumentalism) states that technology has no ends of its own and exists only to accomplish human ends. Technology is completely under the control of humanity and human history is shaped by humans, not technology.People make decisions about what technology they will use and how they will use it. Societies collectively do the same thing. For example, the Japanese banned the use of firearms for hundreds of years in order to preserve their traditional culture. The Amish choose not to use modern technology for religious reasons, even though they are surrounded by modern American communities. Nations put legal restrictions on the use of certain technologies such as weapons. These examples suggest that technology is completely under human control.

Instructional Design
Instructional design is the systematic process by which instructional materials are designed, developed, and delivered. The terms instructional design, instructional technology, educational technology, curriculum design, and instructional systems design (ISD), are often used interchangeably. Below are a few instructional design definitions from various resources on instructional design, instructional technology, educational technology, curriculum design, and instructional systems design:
"The philosophy, methodology, and approach used to deliver information. Some courseware aspects include question strategy, level of interaction, reinforcement, and branching complexity." Source: www.neiu.edu
"Instructional design, also known as instructional systems design, is the analysis of learning needs and systematic development of instruction. Instructional designers often use Instructional technology as a method for developing instruction. Instructional design models typically specify a method, that if followed will facilitate the transfer of knowledge, skills and attitude to the recipient or acquirer of the instruction." Source: www.wikipedia.org
"Instructional Design is the systematic development of instructional specifications using learning and instructional theory to ensure the quality of instruction. It is the entire process of analysis of learning needs and goals and the development of a delivery system to meet those needs. It includes development of instructional materials and activities; and tryout and evaluation of all instruction and learner activities." Source: www.umich.edu

- See more at: http://www.instructionaldesigncentral.com/htm/IDC_instructionaldesigndefinitions.htm#sthash.mwGl0NXS.dpuf
Week 21 - Starting Sunday 30/03/2014 - Valencia, Venezuela. Week 21 Syllabus
Web-Enhanced, Hybrid and Open Classes
I think that the choice of LMS to be used for successful web-enhanced, hybrid and open classes is very important. You may have to use more than one to fulfill the parameters of synchronous/asynchronous transference.
This coming year I'm thinking of using two LMS's to aid me with my open, hybrid and 100% on-line classes. They are Moodle (version 2.7) and WizIQ.
WizIQ is a leading online education platform that offers SaaS based virtual classroom software and complete course delivery system for teachers, trainers, colleges and universities, high schools, and training and tutoring centres around the world.
The WizIQ Virtual Classroom is an online teaching tool you can integrate with your Moodle module and offer real-time collaboration and two-way communication, creating new capabilities for synchronous learning - all from within the LMS environment.
Moodle is known for its ease of use and breadth of tools to help even the smallest teaching operation to thrive. WizIQ, equally, provides for the ability to build your audience, your contacts, and infuse your teaching efforts with face-to-face community building activities, a lively chat room, and a live class that requires a minimum amount of bandwidth and thus allows you to extend your reach to students who may not have the best bandwidth, or upload or download speed in the world.
What does Wiziq offer for the live (synchronous) distance learning class ?
Video and audio communication (and typing of text if audio breaks down).
Chatbox.
Share a file online which can be annotated. (Images, Powerpoint presentations, pdf files, word docs).
Multiple Whiteboards for writing on.
Share a screen.
Polling – live questionnaire.
Share Youtube videos.
Breakout Rooms – whiteboards that can be written on privately and shared later.
Record lessons.
WizIQ provides a great installation guide that can be downloaded and there is always someone you can ask for help if you need it. In addition, there is an enormous amount of WizIQ tutorials and live classes to help you with the WizIQ side of things, and an equally deep set of tutorials, live classes and partnerships with such Moodle training organizations as Dr. Nellie Deutsch’s Moodle for Teachers programs and the frequent free Moodle MOOCs on WizIQ.
Important for all!
Coming soon (starts last week of May '14)
http://www.wiziq.com/online-class/1877396-understanding-the-wiziq-teaching-system
This webinar is the first of a series of weekly online classes on the features available on WizIQ to organize online conferences, deliver MOOCs, and teach synchronous and/or asynchronous courses for fully online, blended, and flipped class programs in private and public sectors.
The live class will focus on the layout and features available for a teacher on WizIQ.
Recordings will be available for those who cannot make the live sessions. However, participants are encouraged to make the live classes as there are many benefits to being in class in real time. The sessions will include hands-on-practice.
Week 22 - Starting Sunday 06/04/2014 - Valencia, Venezuela. Week 22 Syllabus
Personal Learning Networks

The following mind map diagram is very close to MY Personal Learning Networking choices, which are:
Moodle and WizIQ as LMS's for my Courses.
Wikipedia and Scholar for finding answers.
MindManager for elaborating MindMaps.
Youtube, Slideshare, Flickr and Picassa for Multimedia Content.
iTunes, BBC, Google Sites for Podcasts.
Blogger for Blogs, Wikis and Webquests.
Linked In for Professional Contacts.
Onenote for Note taking.
Facebook for messages.
Delicious for Favourite Bookmarks.
Netvibes for real-time social media monitoring.
Slideshare, SlideSpeech, MyNotes and Google drive for Presentations and Documents.
Google Drive Docs for Collaborative writing.

My presentation next week will be about Week 14: Creating Class Elements Part 1: Images and screen-shots.
Week 23 - Starting Sunday 13/04/2014 - Valencia, Venezuela. Week 23
Syllabus
Presentation
Here is my video presentation about the use of Images and Fair Use. I tried out Video Scribe for making the video and really enjoyed it.Week 24 - Starting Sunday 20/04/2014 - Valencia, Venezuela. Week 24 Syllabus
Summarize, assess and contribute

Here's a copy of the Rubric provided by Lisa (please click on it to read better):

Following is a table of the links to my weekly blog posts: Weeks 13 through 24. I made this table in Word, then just copied and pasted directly into my blog page.
Weekly Link
|
Comments
on weekly blog entries
|
An
informal introduction to Tom Hodgers. Where he’s coming from and some of the
crazy things he’s into.
|
|
Some
notes about images. How to easily make screen-shots and a down to earth professional
exposition of all the “Do’s and Don’ts” of image usage from a users point of
view.
|
|
Continuing
with the topic of making organized, configured additions to the course area, this
week I wrote about Adding Video and Audio to a Course. Another professional
exposition to help users.
|
|
An example of an interactive
mind-map from one of my classes, originally
made collectively in a F2F class of a blended learning course, and then saved
as a viewable, interactive SWF file from MindManager.
|
|
A FAQ list made with Google
Forms on Google Drive. The questions are taken from those I have on a Moodle
course for fellow educators called "Using Moodle". I didn’t
particularly like this method.
|
|
Took
another look at Sakai. I’d perused this LMS about a year ago. Like then, I
still find that the support community is sparse and there aren’t many
plug-ins available.
|
|
This
week I wrote a piece about “Connectivism”, one of the on-line education theories extolled by
MOOCER’s, which sees learning as
the process of creating connections and expanding or increasing network
complexity.
|
|
For some unknown reason I found myself attracted to
the technological
instrumentalist’s position of “Technology is just a tool”. This week’s topic of Instructional Design is
very complicated. So many different design principles and procedures. Too
much to absorb and really understand in one week.
|
|
I
looked at “Open Learning” from the method of delivery point of view. How to
deliver an on-line class from an open course, both synchronously and
asynchronously.
|
|
I
was really surprised to find out that I routinely use more than 30 Apps in my
own Personal Learning Network.
|
|
For
my final presentation I chose one of my favourite topics “Images and Fair Use”.
Instead of just making a video of me giving a presentation, I decided to try
out a new app (for me) called Video Scribe, which I found very easy to use. I
used my old trusty Movie Maker 2.6 for inserting the TTS sound track and
adjusting the timing.
|
|
Well,
here we are in the final week. Just click on the Week number in the first column
to link to the blog entries. I found this semester a lot more interesting
than the last. You’ll find my summary
below this table.
|
Although I had a lot of technical difficulties (power and
phone outages) I think I’ve managed to do a pretty good job.
I posted my thoughts and comments for each weeks topic to my blog, commented on the weekly posts to the forum (although rather late in some cases), and posted regularly to the FacBook group.
I found this semesters materials a lot more interesting.
I feel that I’m even more prepared to design and teach on-line classes.
The technical assignments were really interesting this semester.
The blogs and their comments in the weekly forums from people that we were never connected to before, were very inspiring.
One thing I missed this semester - Scott Johnson's witty comments, suggestions and links.
Hope to see you all on the FB group and participating in next years new (as in different) classes.
Bye for now,
Tom.


No hay comentarios :
Publicar un comentario